So, it was a rainy day in Northern Michigan and I was feeling like creating something. I just didn’t know what. After I got out some supplies and started thinking about things I’d like to have but don’t want to buy an idea came to me. I have nowhere in our travel trailer to keep our coffees, teas and hot cocoa mix that is cute and easily accessible. Cool! Now I know what I want to make, but what is it going to look like? Reaching for what sparks imagination like nothing else (the bottle of wine in the pantry) I spied this and knew what I’d make.
No, I am not going to make a loaf of bread. I am going to make a decorative box along the lines of a bread box to match the interior of our trailer.
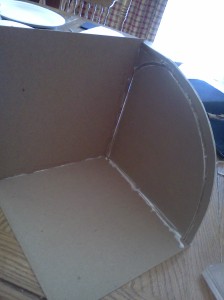
Istarted with chipboard. I knew this was going to have to be pretty sturdy so I planned on doubling up the chipboard for the sides and the top. I rough sketched an arc on one sheet of chip board and cut it out with a craft knife. Using the first side piece as a pattern I cut out the second side. Next I cut a strip about 1/8″-1/4″ out to create the base of the groove the lid will move in. Then I glued the pieces I cut out onto another sheet of chipboard. I cut 1/8″ off the back and bottom of my side pieces so they would fit together better later in the process. Finally I cut a flat edge off the top of each arc so the top to my box would fit nicely. The last image is not correctly oriented – it shows the top of one side and the bottom of the other. Make sure when you are gluing your pieces together you have 2 mirror images, NOT exact copies!!!
I set the sides aside (see what I did there? Pretty funny, eh?) to dry and began working on the door of my box.
I began with 2 sheets of chipboard, cutting them into 1/2″ strips. Once the strips were cut I aligned them as perfectly as possible and glued a piece of flexible fabric to the back side. This held the strips together as I was working on the front of my box.
As this sheet is drying I began to work on the front of my box. I wanted a toile-ish look to the front of my box but did not have any paper that had what I was looking for so I decided to make it myself. Starting with a sheet of white cardstock I stamped images on the paper in red and brown ink and embossed them using different shades of red embossing powder. Next I used an inkssentials blending tool to add Tim Holtz distress inks in scattered straw and brushed corduroy to the background. I was very pleased with the result.
After my paper was finished I glued it to the cover of my breadbox (opposite of the side my fabric was glued on) and added stitching detail with dark brown memory floss. I was very happy with the way things were coming together at this point in time. I had a glass cabinet pull just waiting to be used in a project like this. I punched a hole in one of the slats and used a small bolt to tighten the cabinet pull in place. (It doesn’t show up in these pictures, look for it later. It is PRETTY, I promise!)
Once my sides and covers were dry I began fitting the pieces together trying to see how the box was going to work. Noticing that I needed a deeper groove for my door to fit in I cut 1/8″ strips of chipboard from my scraps and glued them along the inside and outside edge of the track I had created earlier. Then I glued one side of my box to the base and the back. Once the glue dried I painted the inside of the box with Tim Holtz Distress Crackle paint in Brushed Corduroy. After all, the inside of the box has to be as pretty as the outside!
The next part was a test in patience. Aligning the cover in one groove and setting it in the opposite groove while keeping everything square and straight. I’d advise buying any children in the vicinity some ear plugs so they are not exposed to the outbursts that may occur during this step.
Now that the back and sides are glued securely and the front is nicely seated in its track I made a small shelf/top to add some strength to the box and a little extra storage area. It also hides the ‘rolling’ features of the door. I did this by doubling up a few pieces of chipboard and wrapping the shelf in a coordinating paper.
Finally I added some paper to the outside of my box to finish it off. I also added a leather strap along the middle of the arc. I did this for a few reasons. First off, it gave me a place to hang things like coffee scoops or tea balls inside the box. It also added some strength to the sides of the box, the movement of the lid wanted to push the sides out allowing the lid to pop off its track.
After a few coats of a sealant here is the final project in place. Perfect, don’t you think!
All the materials I used in this project, or at least very similar materials, are available from Home and Garden Welcome. Stop by and find what inspires you. I’d LOVE to see what you can create!
Happy Crafting,
~Nikki
Related articles
- exciting news… tim holtz app (timholtz.com)


